January Development Update

:globe_with_meridians: Connected Snippets

Note: If you do not use the {urlload}, {urlsend} or {image} commands, you may skip this bit and go directly to the "Improved Snippet Editing" section.

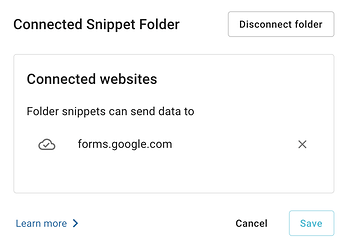
We are grouping the {urlload}, {urlsend} and {image} commands into a feature called "Connected Snippets". Connected Snippets are an advanced feature for Pro and Business users, which allow you to connect different web application together with snippets.

In new folders, when attempting to use one of these commands, you will be prompted to make the folder a "Connected Snippet Folder". You will also be required to list which sites you want the folder to connect to. These steps are mandatory. Until you connect the folder, these commands will not work.

Existing folders will continue to allow these commands for the time being, but you should go through the quick steps of connecting any folder that uses them. In the future, we will be disabling these commands in all existing folders that have not been connected. At that point, these commands will cease to work in those folders, and you will need to connect the folder to reenable them.

:pencil2: Improved Snippet Editing

We've made a couple of important improvements to snippet editing.

First, we've fixed a long-standing issue where the font-family and font-size menus would sometimes incorrectly report the current font.

Next, we've added a highlight to the currently selected replacement command. This is especially useful for complex snippets and commands that have a start and end, such as {formtoggle} or {if}.

In the example below, we've selected the inner {formtoggle}. As you can see, the highlighting now makes it easy to see the matching {endformtoggle}.

As always...

If you have any questions feel free to post to our Question and Answer community forums. And if you have anything you would love to see in Text Blaze, please suggest it in the Features Ideas section.

Thank you for having been with us in the past year, and we wish you a pleasant 2021!
3 Likes

Hi,
First bravo and wonderful service and feature

I understand that we can create an email template in which we have fields whose variable we can select to compose a totally personalized text
I use a Zoho CRM which has an email sending module which unfortunately requires creating as many emails as there are situations and it's very painful
Would it be possible and if so how to insert your template in a Zoho model mail document and then be able to choose in the document the value of the fields to insert the corresponding text blocks?
Waiting

Français

Je crois comprendre que l'on peut créer un template d'email dans lequel on a des champs dont on peut sélectionner la variable pour composer un texte totalement personnalisé
J'utilise un CRM Zoho qui dispose d'un module d'envoi d'email qui malheureusement impose de créer autant de mail que de situations et c'est très pénibles
Est-ce que ce serait possible et si oui comment faire pour insérer votre template dans un document mail modèle de Zoho et de pouvoir ensuite choisir dans le document la valeur des champs pour insérer les blocs de textes correspondant ?

Hi @Renaud_Laurent,

I'm not sure how far you want to take the customization, but there's definitely a lot you can do. If I understand you correctly, you want to have a number of dynamic fields that will change according to a choice you make at the beginning of the email.

Here's one way you could approach it:

{note}
Choose your template: {formmenu: name=template; default=Choice A; Choice B; Choice C}

{if: template=="Choice A"; trim=yes}
{paragraph1="This is paragraph one of Choice A"}
{paragraph2="This is paragraph two of Choice A"}
{paragraph3="This is paragraph three of Choice A"}

{elseif: template=="Choice B"; trim=yes}
{paragraph1="This is paragraph one of Choice B"}
{paragraph2="This is paragraph two of Choice B"}
{paragraph3="This is paragraph three of Choice B"}

{elseif: template=="Choice C"; trim=yes}
{paragraph1="This is paragraph one of Choice C"}
{paragraph2="This is paragraph two of Choice C"}
{paragraph3="This is paragraph three of Choice C"}

{endif: trim=yes}

{endnote: trim=right}

{=paragraph1}

{=paragraph2}

{=paragraph3}

Here's how that works:

In the first part, I have a {formmenu} command. I've given it the name "template". Because of the name, the choice I make in this menu will be associated with the variable called "template", which means I can reference it later.

Next, I have an {if} command where I check the contents of my choice in the menu mentioned above. Based on my choice, the {if} command assigns content to the variables called "paragraph1", "paragraph2" and "paragraph3".

Once I've wrapped up my {if} command, I go into the actual content that is going to show up when I insert the snippet. Here, I'm just recalling the content of the variables "paragraph1", "paragraph2" and "paragraph3".

Try changing the menu uption in the live snippet above and notice how the output changes accordingly.

If you'd like to swipe the example above as a starting point, you can do so by clicking the button "Copy to Text Blaze" at the top right.

I hope this helps. If you want more ideas, let me know :slight_smile: